
Use the current official installation instructions
The official guide is the starting point for installation. Check its supported environment, image/version guidance and configuration before running commands. We have not published an independently tested configuration yet.
Plan persistent data and access
Identify all persistent data and secrets. Decide who should reach the application and which users require administrative access. Avoid copying a development example directly into a public deployment.
Verify health and recovery
After setup, check the documented health behavior, create a small sample, and perform a recovery rehearsal. Record the environment and exact version so the result can be reproduced.
Choose an upgrade and rollback process
Read release notes and the current upgrade guidance before changes. Keep a usable recovery point, and test important workflows after the update.
Pick an installation path that matches the environment
NocoDB’s official self-hosting documentation separates a local quickstart, a single-server HTTPS path and custom infrastructure. Start with the path matching the actual environment. A local trial is useful for inspection, but it does not establish the production configuration, load capacity or recovery properties of a different installation.
Separate licence, features and infrastructure
Confirm the current licence and the edition required for the intended use. Then record the application version, supported connections, persistent data and authentication requirements. A feature visible in a hosted demonstration is not evidence that it is available in the chosen self-hosted plan. The product reference and specialist guides keep those questions separate.
Check the complete workflow after setup
Use a synthetic table and the actual read, create, update and export operations the team needs. Test a normal user and any API identity separately. Then inventory application state, connected source data, configuration and uploaded files for recovery. A successful request proves only that request under the current configuration.
- Verify the intended public address and access behavior.
- Exercise representative data operations on a separate sample.
- Record which stores belong to the application and which belong to connected sources.
- Restore the required data before accepting the operational plan.
- Recheck required workflows after an upgrade or edition change.
Inspect the interface, with its context.
Open a specimen to see the source image and the observations it supports. A vendor demonstration is distinct from a self-hosted installation.
NocoDBHistorical vendor product image · Image identifies v2.3; not the current release
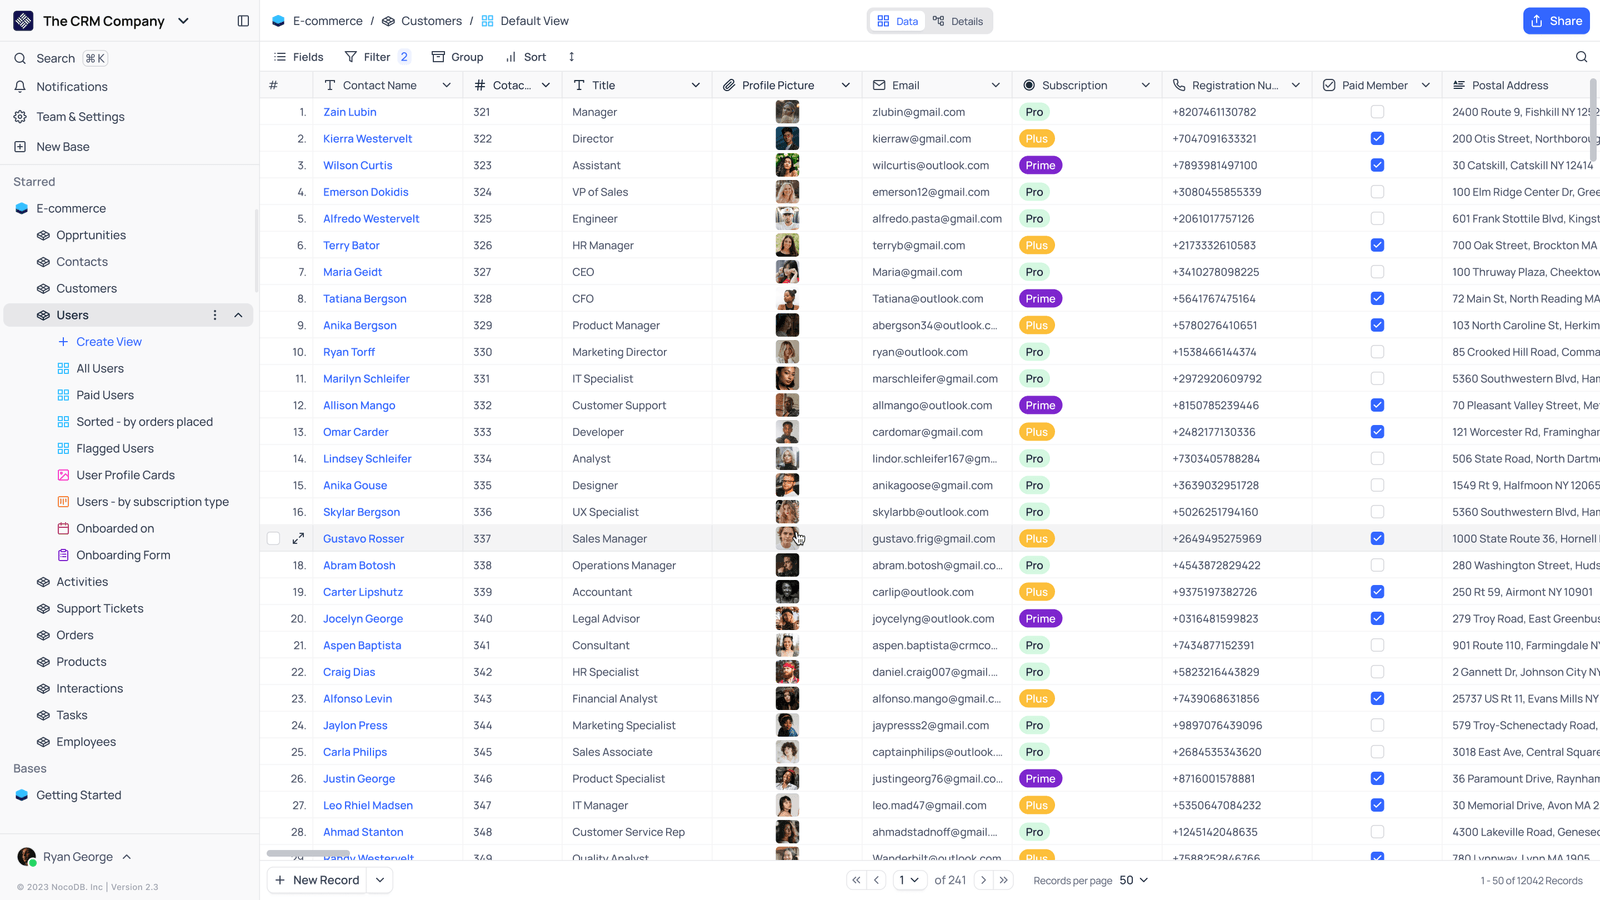
- Saved viewsThe vendor image shows several named views in the left navigation.
- Grid controlsFields, filtering, grouping and sorting appear above the record grid.
- Typed columnsThe example includes text, email and labelled select values. Check the current edition for availability.
Follow the documentation.
Consult the current official instructions before making changes. No independent deployment benchmark is claimed here.
nocodb.comOfficial documentation ↗nocodb.comOfficial documentation ↗